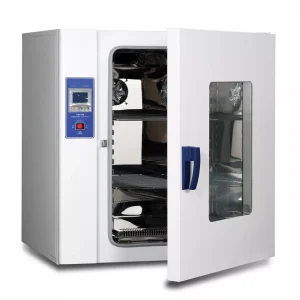
Hot Air Sterilizer | Drying Oven 45L | Digital Electric Constant Temperature Drying Oven | Industrial Medicine Blower Drying Oven | Heat Treatment Cabinet | 1KW | KH-35A
Specifications:
- Name: Electric constant temperature drying oven
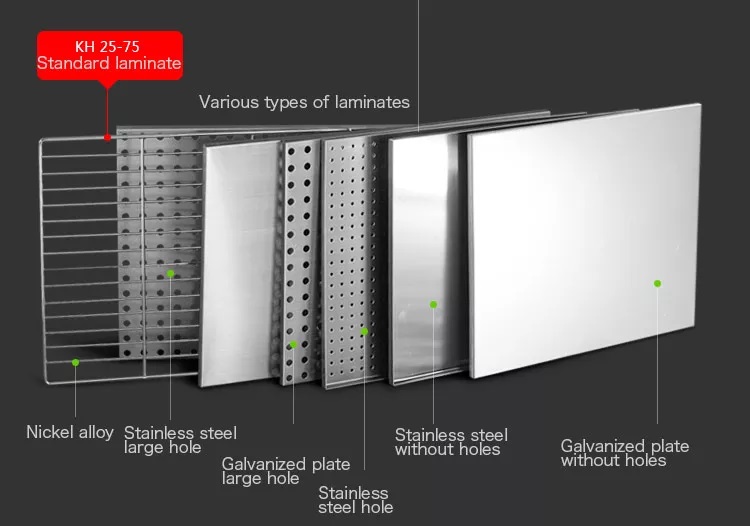
- Inner material: galvanized steel plate
- Model: KH-35A
- Voltage: 220 V
- Power: 1 KW
- Inner Size: 35 x 35 x 35 cm (height*width*depth)
- Overall Size: 53 x 64 x 55 cm (height*width*depth)
- Temperature: +5 ~ 250℃
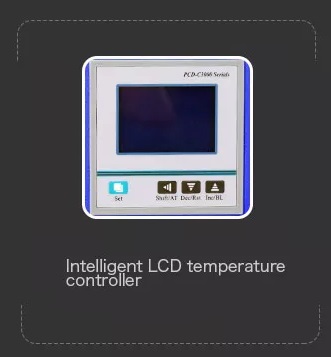
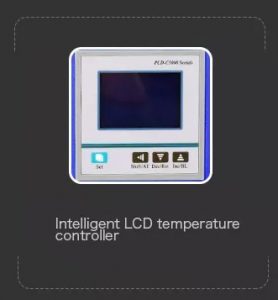
- Intelligent PID control digital display
- The Timing Range: 0 ~ 999 minutes
- Accuracy: ± 0.5
- Fluctuation: ± 1%
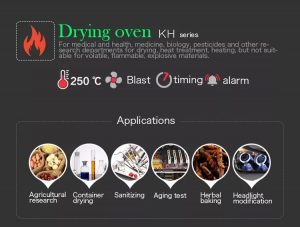
Scope of Application:
- Agriculture research
- Container Drying
- Sanitizing
- Aging test
- Herbal baking
- Headlight modification
- Heat treatment or heating for Health
- Medicine
- Biology
- Scientific research and other departments
Note: it is not suitable for volatile, flammable, explosive, and other items to avoid causing an explosion
Features:
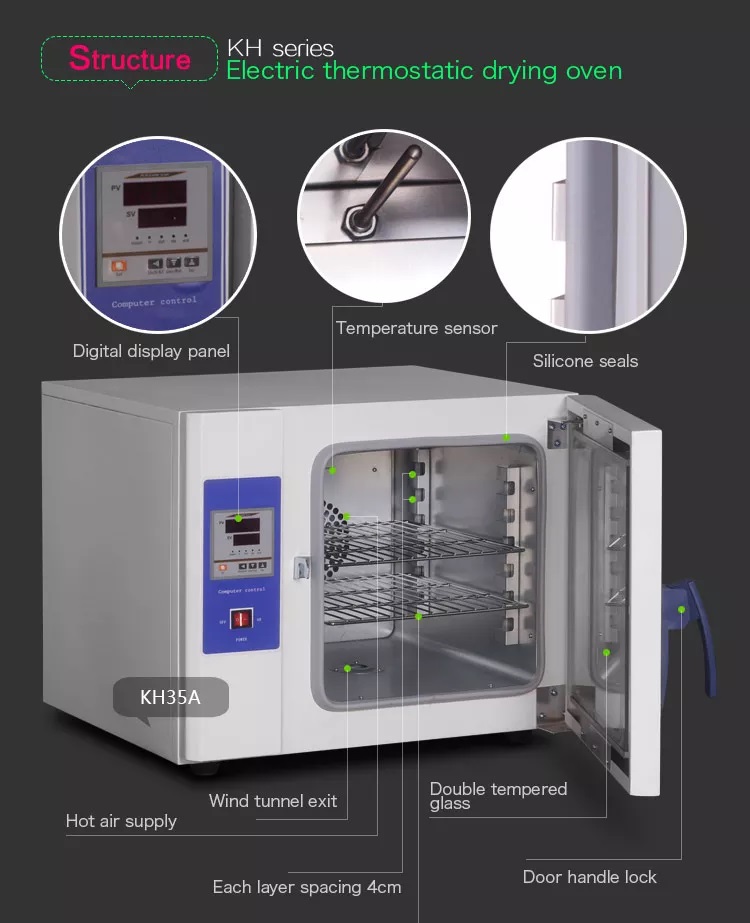
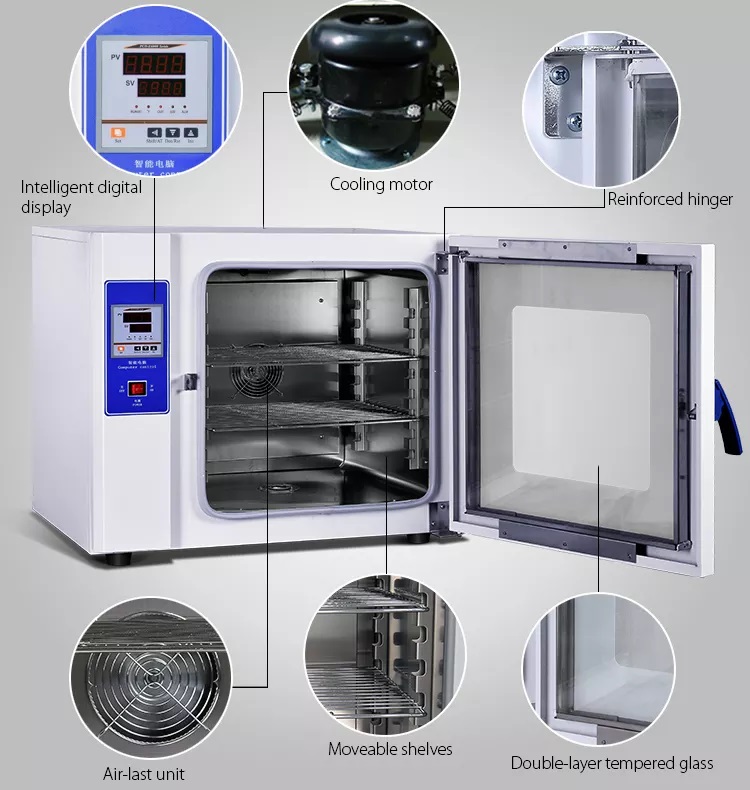
- Using microcomputer intelligent PID control technology, the system has the functions of temperature control, timing, and over-temperature alarm
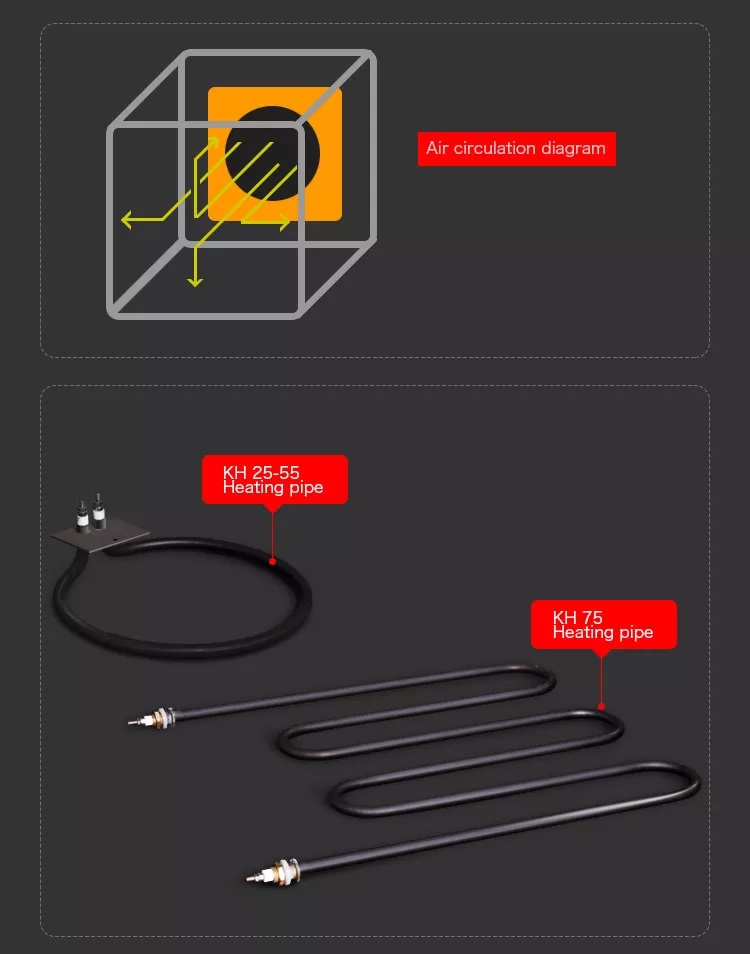
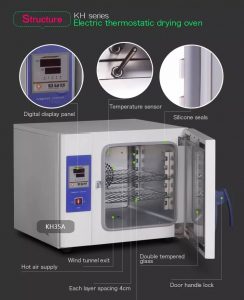
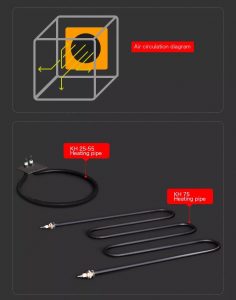
- The external hot air circulation system is composed of a low-noise fan and an air duct.
- The shell is made of a high-quality cold-rolled steel plate treated by environmental protection electrostatic spraying. The overall design is beautiful and novel and has a large viewing window
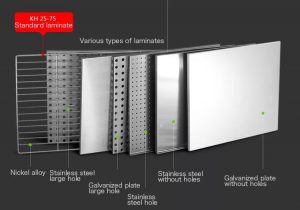
- The inner material is made of mirror stainless steel, and the half arc corners are easy to clean
- The shelf spacing is adjustable
- High-temperature resistant silica gel is used as the sealing edge of the door and a high-temperature heating pipe is used as the heating element to ensure safety and long service life
Package included:
- 1x Electric constant temperature drying oven
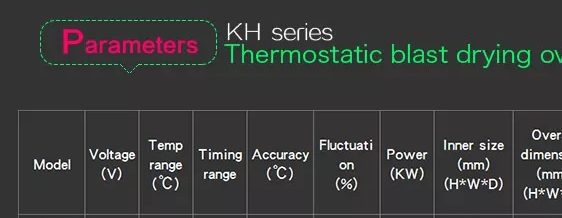
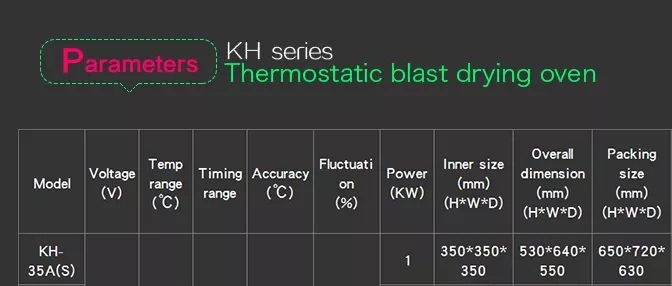
Parameters:
- Power (KW): 1
- Inner size (H*W*D): 35 x 35 x 35 cm
- Overall dimension (H*W*D): 53 x 64 x 55 cm
- Packing size (H*W*D): 65 x 72 x 63 cm
This drying oven is used in biology, chemical pharmaceutical, medical treatment unit, industry and mining enterprise, universities and colleges, and scientific research for drying, melting wax, sterilizing, and disinfecting
Principle and structure
- The heating tube is at the back of the inner chamber, the fan is in the back of chamber, temp.
- The controller controls the constant and change of temperature,
- The airflow inflows the inner chamber via a heating tube, and the function of the fan is to make the inside temperature more uniform.
- arc-design, shelf space can be adjusted, built-in temp. probe.
- Wool rock is the thermal insulation material between the working chamber and the shell,
- The shell is made of steel plate, the shell is dealt with spray paint,
- The inner chamber is made of zinc-plating or stainless steel the observation window is made of double-tempered glass silicone door seal to make sure better sealability, and enhance the stillstand performance of the inner chamber.
- This drying oven is equipped with intelligent temp. control system. (with timing function and precise temp. control)
Use method
Make sure the switch is in the “off” position before power on, check whether it is a broken circuit or leakage, connect the power, turn on the power switch
Panel display
Indicator
1.” RUN/AT” indicator:
It is on when running, it is out when over flashing when auto-setting
2.” OUT” indicator:
It is on if there is heating output, or it is out
3. “ALM” indicator:
It is on when over-temperature is alarming, or it is out
4. WL and WH is an invalid indicator
Operation and use method
1) When power is connected, the upper screen displays “InP”
- the lower screen displays “scale value”, it will enter normal status after 3 seconds
2) The reference and setting of temperature and soaking time
A: if no timing function
- Press the “set” key, to access temperature setting mode, and the lower screen displays “SP”,
- the upper screen displays the setting temperature (the units digit flashing first),
- then modify the needed setting value via shift,
- increase and decrease key; press the “set” key again to log out of setting mode, and the modified setting value will be saved automatically.
- It will return to the normal display mode without pressing any key in one minute.
B: if with timing function
- Press the “set” key, to access temperature setting mode, the lower screen displays “SP”, the upper screen displays the setting temperature (the units digit flashing first),
- then modify the needed setting value via shift,
- increase and decrease key; press the “set” key again, enter the setting mode of soaking time,
- the lower screen displays “St”, and the upper displays the soaking time setting value (the units digit flashing first),
- Press the “set” key again to log out of setting mode, the modified setting value will be saved automatically when the soaking time is set to “0”, it means without a timing function, the controller runs continuously, and the lower screen displays the set temperature;
- when the setting value is not “0”, the lower screen displays the running time or setting temperature, the last decimal point is on, after the measured temperature reaches to setting temperature, the timer starts timing, the decimal point is flashing, time is up, running stops, the lower screen display “End”, with continuous beeper.
- after running is over, long press the “decrease /restart” key to reboot
3) There is something wrong with the sensor
- If the upper screen displays “——” it means there is something wrong with the sensor,
- If the temperature is outside of the measured range or the controller fails, the controller will disconnect the heating output automatically, the beeper keeps beeping and the alarm indicator is on, please check the temperature sensor and connection.
- When over-temperature alarming, the beeper beeps, and the “ALM” alarm light is on;
- when lower-temperature alarming, the beeper beeps, “ALM” alarm light is flashing, if a change in setting temperature results in an over-temperature alarm, the “ALM” alarm light is on, without the beeper
4) Press any key to mute
5) “Shift” key:
- press this key to modify the setting value.
6) “Decrease” key:
- Press this key to decrease the setting value, long press this key to continuously decrease the setting value
7) “Increase” key:
- Press this key to increase the setting value, and long press this key to continuously increase the setting value
8) in setting mode, without pressing any key within 1 min
- it will return to normal mode automatically
A) Auto-setting
Please proceed with auto-setting if the control effect of temperature is not ideal.
- if the temperature soaring seriously when auto-setting, take this factor into consideration fully before the user proceeds with system auto-setting
- Under non-setting status, long press “shift/At” for 6 seconds to enter auto-setting, and the “RUN/AT” light flashes, this light stops flashing after auto-setting is over, and the controller will obtain better PID parameters. and the parameters will be saved automatically.
- during auto-setting, long press “shift/At” for 6 seconds to stop auto-setting.
- When auto-setting, if it is over-temperature, the “ALM” alarm light is out, no beeper, but the heating alarm relay will be disconnected automatically.
- The “set” key is unavailable during auto-setting. when auto-setting, no matter whether there is a soaking-time setting, the lower screen always displays the set temperature.
B) Interior parameters
- Long press the “set” key for 3 seconds, and the lower screen displays the password prompt “Lc “, and the upper screen displays the password value, to modify the needed password value via increase, decrease and shift.
- Press the “set” key again, if the password value is incorrect, it will return to normal mode automatically if the password value is correct, then enter the setting status of the interior parameter,
- Press the “set” key again to modify the parameter in turn.
- press the “set” key for 3 seconds to log out and the parameters will be saved
Interior parameter -1
| Parameter | Parameter name | Parameter function | (range) Factory default |
| Lc- | Password | When “Lc=3”, check and modify the parameter | 0 |
| ALH- | Over-temp. alarm | When test temperature > setting temperature, the alarm indicator is on, the beeper beeps, disconnect the heating output | (0.0~100.0°C) 20.0 |
| ALL- | Lower-temp. alarm | When the test temperature < setting temperature, the alarm is on, the beeper beeps, disconnect the heating output | (0.0~100.0°C) 20.0 |
| T- | Control cycle | Heating control cycle | (1~60 seconds) note: 1 |
| P- | Proportion | Time proportion adjustment | (1.0~ scale) 35.0 |
| I- | Integral time | Integral action adjustment | (1-1000 seconds) 200 |
| d- | Differential time | Differential action adjustment | (0~1000 seconds) 200 |
| Pb- | Zero adjustment | Modify error margins of the sensor (low temperature) Pb=actual temp.-test temp.) | (-12.0~12.0°C) 0.0 |
| PK- | Full-scale adjustment | Modify error margins of the sensor (high temperature) PK=1000*(actual temp.-test temp.) /test temp. | (-999~999) 0 |
Note 1: the controller model is PCD-2xx2 (relay output), the Factory default of the heating control cycle is 20 seconds, and another model is 5 seconds
Inter parameter -2
| Parameter | Parameter name | Parameter function | (range) Factory default |
| Lc- | Password | When parameter “Lc=9” check and modify | 0 |
| Co- | Turn off the heating output | When test temperature ≥ setting temperature +Co, Turn off the heating output | (0.0 ~ 50.0°C) 5.0 |
| Hn- | Timing way | 0: minute timing; 1: hour timing | (0~1) 0 |
| rH- | Mileage value | The maximum value of setting temperature | (0~400.0°C) 300.0 |
The comparison table of English names and parameter prompt
Notice:
- if the user wants to reach the ideal control effect of temperature but without system auto-setting, give P、 I、 D initial value according to the below parameters of different equipment.
- if still can’t reach the ideal control effect of temperature, please proceed with system auto-setting
| p (proportion) | (Integration) | D (differential) | Equipment style |
| 35.0 | 200 | 200 | Drying oven and oil bath equipment |
| 15.0 | 200 | 200 | Heating incubator |
| 6.0 | 100 | 100 | Water bath and water tank |
Notice
1. The samples should not be placed too crowded, so as not to affect convection inside the chamber.
- Please connect the oven with a protective conductor terminal according to relevant regulations. in order to be safe, don’t touch the electrical circuit which is in the left oven with your hand and wet cloth
2. Don’t splash water on the observation door, or it may crack
3. Don’t use this kind of oven to dry inflammable, volatile, and explosive substances, or it may cause an explosion
Maintain
1. Drying oven should be kept clean,
- please use a cotton cloth to clean the glass door, in order to avoid a chemical reaction, do not use a corrosive chemical solution to sweep
2. If the drying oven is not used for a long period, in order to avoid corrosion,
- should be applied with neutral grease or vaseline in the electroplating pieces. and placed in a dry indoors
3. Please operate this oven according to our manual,
- if there is something wrong with this oven, please refer to the below solution
Wiring layout
Trouble shooting and Failure analysis and solutions
| Trouble | Failure analysis and solutions |
| 1. The equipment fails to work after power is connected |
|
| 2. Temperature stops rising |
|
| 3. Motor fails to run | Result: it is running, but the airflow is unable to circulate, leading to the temperature rising slowly, then contact us |
| 4. Handle is broken | Replace and contact the supplier |
| 5. There are differences between the temperature that the panel displays and the mercury temp. | premise:
|
| 6. Temperature appears to bounce * there or keep stationary, or abnormal “—-“ |
|
Drying oven
1) 2 shelves
Technology parameter
After-sales service
- (1) One-year warranty, lifetime service. and this product is warranted for a period of twelve months from the date of original purchase, please retain your receipt to establish proof of purchase!
- (2) Don’t dismantle, repair or refit equipment without authorization and guidance from our company. This warranty does not extend to the repair or refit of any products.
- (3) This warranty does not cover any damages which are caused by improper operation, improper power output, or improper cable connection.
- (4) If the product is located outside of china, during the warranty period, we will offer the parts for free. but not bear freight charges. If outside of the warranty period, you need to pay for the parts and the freight charge as well.
- (5) The warranty does not cover consumable parts, such as light lamps or glass doors, and so on.


 Health Medical Support and Splints
 Waist
Waist Knee
Knee Ankle
Ankle Foot
Foot Elbow
Elbow Neck
Neck Shoulder & Clavicle
 Calf
Calf Arm
Arm Finger
 Head
Head Hip
Hip Rib
Rib Thigh
Thigh Wrist & Palm
 Medical Shoes
 Medical Sandal
 Medical Sabo
 Medical Slipper
 Elastic Stockings + IPC Devices
 Medical Line Stockings
 Sheer Line Stockings
 Diabetic Stocking
 Travel Socks
 IPC Devices
 Wheelchair
 Economy Steel Wheelchair
 Standard Steel Wheelchair
 Aluminum Wheelchair
 Child Wheelchair
 CP Wheelchair
 Full Reclining Wheelchair
 Power Wheelchair
 Active/Sport Wheelchair
 Commode Chair | Bathroom Safety
 Wheelchairs Accessories
 Mobility & Daily Living
 Walkers
 Crutches
 Quad Canes | Tripod Canes
 Aluminum Canes
 Brass Canes
 Rubber Tips
 Respiratory Devices
 Blood Pressure Monitors
 Arm Type
 Wrist Type
 Aneroid
 Mercury | Mercury Free
 Clinic Use
 Spare Parts
 Glucose Meter & Insulin Management
 Weight Scales
 Thermometers
 Stethoscopes & Diagnostic Equip
 Stethoscopes
 Otoscopes
 Ophthalmoscope
 Penlights
 Hammers
 Tuning Forks
 Goniometers Tourniquets
 ECG Monitors
 Doctor Scrubs & Lab Coats
 Beauty & Personal Care
 Dental Care
 Anti-Aging & Shaping fiber YALURONICA
 Women Shaping Line
 Men Shaping Line
 Women Maternity Line
 Liposuction Supplies
 Massaging Devices
 COLD / HOT Therapy Packs
 Comfort & Sore Management
 Medical Pillow
 Medical Cushion
 Medical Cushion | Ulcer Cushion
 Medical Bed Mattress
 Medical Back Support
 Medical Abduction Wedge
 Neck Pillow
 Electric Heating
 Rehabilitation & Physiotherapy
 Medical Furniture
 Aids to Daily Living
 Cast & Bandage Protector
 Pills Manager
 Urinal | Bed PAN
 Vaginal Douche | Enema Irrigator | Sitz Bath Tub
 Disposables
 Adult Diapers
 Syringe
 Face Mask
 Respiratory
 Gloves
 External Catheter | Condom Catheter
 Foley Balloon Catheter
 Gauze
Gauze Urine Bag
 Feeding Tube
 Wound Dressing
 Emergency & First Aid
 Treadmill
 Elliptical Trainer
 Recumbent Bike
 Exercise Bike
 Home Gym
 Bench
Bench Sport Accessories

 Bracelet | Leather
 Pendant | Steel


